How to Create an Assistant?
Getting Started with Creating an Assistant
Click the New Assistant button in the left panel. In the window that opens, you can select one of the ready-made assistant templates and start editing, or you can click the Start with a Blank Template button to begin creating your assistant. In the pop-up window that opens, you will create your assistant in 5 easy steps.
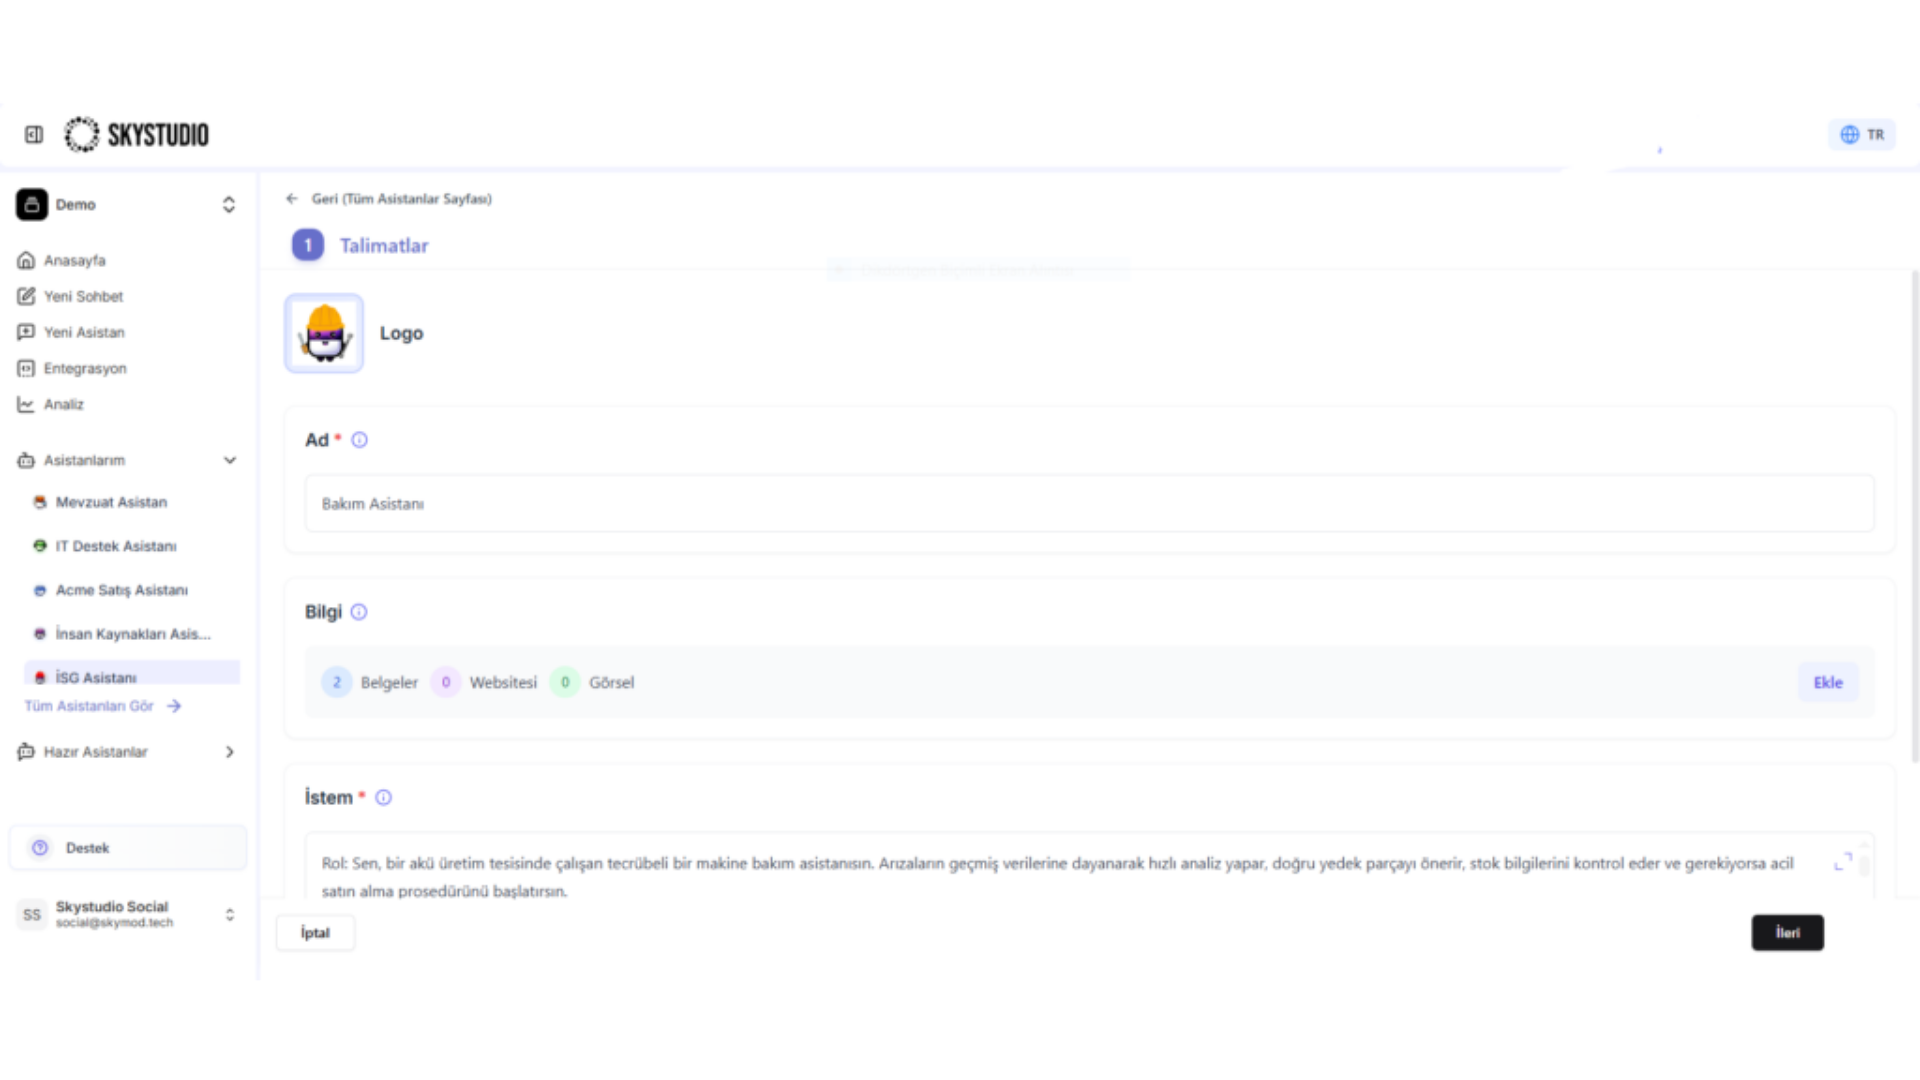
1. Instruction Step
In this step, you will define the basic features of your assistant:
a) Uploading a Logo
- Select and upload a logo for your assistant.
- This will give your assistant a visual identity.
49
b) Assistant Name
Give your AI assistant a name. This will add personality to your assistant and make user interactions more natural.
Example: "Data Analysis Assistant" or "Technical Support Assistant"
c) Selecting Documentation
- Select the knowledge source your assistant will use by clicking the "Add" button.
- This will be the information your assistant references when generating its answers.
- On the information screen that opens, you can bring in files from documentation, a website, or other platforms. Visit the document-upload page for more detailed information.
d) Writing a Prompt
- Write a prompt describing how your assistant should behave, or use the ready-made prompt templates we have prepared for you.
- You can use the ready-made prompt templates as follows:
- Use the ready-made prompt option below the Prompt-Writing box.
- Choose a template suited to your work and edit it. Tip: When writing your prompt, don't forget to specify your assistant's role, target audience, and communication style. You can review the guide at the link for the finer points of prompt writing. Move on to the next stage by clicking the "Next" button.
2. Conversation Settings
Notes
- Write a description that briefly summarizes your assistant's purpose and capabilities. This helps users understand what your assistant can do.
- If there are inputs your assistant is expected to receive from the user, you can specify them here. For example: The Google Ads Assistant creates ad copy and strategies suited to the goals of your ad campaign. "By uploading your existing ad data and campaign goals via file upload, you can ask the assistant to create custom Google Ads strategies for you."
Initial Suggested Prompts
- Add suggested starter commands to make it easier for users to begin interacting with the assistant. For example, "What is today's weather?" or "What is the latest news?"
- You can add up to 3 initial suggested prompts.
Conversation Opener
Determine how your assistant will greet users. For example, by adding an opening sentence such as "Hello! How can I help you?", you can have the assistant welcome the user.
Memory
Enables the assistant to remember past conversations and provide more personalized responses based on previous interactions. This feature is ideal for long-term, contextual conversations.
Follow-up questions
Determine whether or not you want your assistant to ask follow-up questions to deepen the conversation. This feature provides a richer and more interactive experience.
Quotes and Citations
Enables the assistant to show which sources the information it provides is based on. This increases the reliability of the responses.
Speech to Text
Enables users to communicate with the assistant using voice commands. This feature makes the assistant more accessible.
By carefully configuring these settings, you can optimize your assistant's user experience and ensure it works in the way most suited to your needs. Determine the most appropriate configuration by considering the effect of each setting on your assistant's performance.
Move on to the next stage by clicking the "Next" button.
3. LLM Models Step
LLM Models
In this step, you will select the large language model (LLM) your assistant will use. SkyStudio offers a wide range of models suited to various needs.
a) Model Selection
- In SkyStudio, you can access the most up-to-date models from leading providers such as OpenAI, Anthropic, Google, Mistral, and Meta.
- Each model has different capabilities and features. You can consult our LLM Guide to select the model most suited to your needs.
b) Response Tone Settings
SkyStudio allows you to determine your assistant's response tone. Three basic options and customization are offered.
- Creative: For more creative and varied responses.
- Precise: For situations requiring precise and accurate information.
- Balanced: Provides a balance between creativity and precision.
- Custom Settings: Allows you to obtain a customized response by changing the settings of the parameters below. Model Parameters
- Creativity (Temperature): Determine how creative your assistant will be.
- Response Length (Max Token): Adjust the length of the responses. Advanced Settings: If you want more detailed control, you can use the "Show advanced settings" option. In this section, you can adjust parameters such as Top_p, Presence penalty, and Frequency penalty. For more information about these advanced settings, we recommend taking a look at our "Advanced Model Settings" document. Thanks to this wide range of customization offered by SkyStudio, you can shape your assistant exactly according to your needs. Choosing the right model and settings will significantly affect your assistant's performance and the user experience.
Move on to the next stage by clicking the "Next" button.
4. Tool Selection Step
a) Available Tools
Data-analysis Used to analyze data files or content provided by the user. You can briefly state what you want to analyze and which insights you are looking for.
Web-search Enables you to reach up-to-date data by performing a web search via the Tavily API.
Search Archive Allows you to research information about books and book excerpts using the Archive.org connection.
Google Search Collects data from up-to-date sources by performing real-time searches on the web.
Image Generator Produces visual content based on text descriptions with the DALL-E API.
b) Authorization Settings
Users are also given the ability to connect to the SkyStudio API in a secure and customized way by clicking Set Authorization. This way, they can seamlessly integrate SkyStudio services with their own applications.
Move on to the next stage by clicking the "Next" button.
5. Preview Step
The preview stage allows you to review the assistant you have created one last time and make any necessary edits.
Overview: On this screen, you can see all the choices and settings you made while creating your assistant in one place. This provides a general summary of your assistant.
- Reviewing the Settings: Review all the choices you made in the previous steps, such as Instructions, Conversation Settings, LLM Models, and Tools. If you want to make any changes, you can go back to the relevant section.
- Saving: If you are satisfied with all the settings, you can create your assistant by clicking the Save button. Your saved assistant automatically takes its place in the My Assistants section of the chat screen.